Tuesday, July 12, 2011

Mint Chutney

I love, love mint chutney. I love putting it in sandwiches, eating it with salads, dabbing it here and there and so basically everywhere. If I can consume it, it will be there. Well apart from anything that is sweet. This variation is taken from word of mouth from two real people and it involves all of the following.

The ingredients

1 bunch of coriander (leaves)
3 bunches of mint (leaves)
1 onion
A pack of chill (the type of the chili depends of the amount of heat you want)
A juice of a lemon
a garlic clove
an inch of ginger
Salt to taste

The method

Place all ingredients into a blender and process until smooth. As easy as that. I placed an entire packet of small red chilies into the chutney for the punch factor. You could add the chutney to yogurt for a minty yogurt. This will go well with any curry.

Pumpkin Curry

I decided to make pumpkin curry. There was a rather large chunk of pumpkin that was sitting in my fridge and was threatening to go off. It was part of a larger chunk, in which was part used to make roast pumpkin. The rest of it was then put in the fridge and I was not too sure what to do with it. So it sat in the fridge for a bit.

My mind was then cast back in time, say about ten years ago, I was first introduced to India. It was very, very hot in the summer and could be rather chilly in the winter. I was introduced many curries, that is north Indian curries and pumpkin curry was one of them. I have not had pumpkin curry for ten years and so I then knew what to do with my pumpkin. It was not to be roasted, nor turned into soup but it was to be curried.

This is a relatively quick meal. I found I spent more time removing the skin of the pumpkin rather than cooking. I  find the practice of cutting off the skin rather daunting. With sudden quick knife slip just missing my fingers, I made sure after that I was careful.

After finding a recipe on Healthy, Yummy Vegetarian Recipes (I do not have the link), I found the ingredient composition a educational experience. There were such things as ajwain, sanuf...............................two month pass and I have lots the recipe for this. I do have the pictures though but the recipe disappeared into the void that is my unit. Some other things have disappeared yet to be uncovered. Perhaps I myself disappeared into some sort of void and now have re-emerged because where have I been for the past two months or was it three.

I do not usually like pumpkin, but this curry masked the taste of the pumpkin to some extent that I was able to eat it.

Monday, May 16, 2011

Cookies and cream cheesecake

I had recently made a cheesecake that flopped when I took it out of the pan. I should have taken a photo of my failure, for cooking is filled with its failures and its successes. This time I did not want it to flop and so I made sure it had adequate gelatine. This recipe required 8 little cheese cakes to be shaped by PVC piping. As this was probably the only time that I would require the PVC piping and so I opted for the springform tin. 

This recipe was taken from the Womens Weekly Cupcakes Cheese Cakes Cookies that sister dearest gave me. What a wonderfully beautiful cook book. I so inspire to one day master your recipes even though I failed at your macarons and Easter egg cup cake basket. For this challenge I decided to make the cookies and cream cheesecakes.

The Ingredients

The Base
125 grams plain chocolate biscuits
75 grams butter, melted

Filling
2 teaspoons gelatin
2 tablespoons water
375grams cream cheese, softened
1 teaspoon vanilla extract
1/2 cup caster sugar
300ml cream
180 grams white eating chocolate, metled
150 grams chocolate cream-filled biscuits, broken

The method

Grease a 24cm spring-form pan and line it with baking paper.

For the base process the biscuits until fine. Add the butter and process until combined. Place the mixture in the springform pan and spread evenly along the base of the pan until it is level and compressed. Place in the fridge for 30 minutes.
I use the bulldog clips to keep the baking paper in place

Melt the gelatine in warm water until all is dissolved.

Beat cheese, extract and sugar in a bowl with an electric mixture until smooth. Beat in the cream and then stir in the white chocolate, gelatine mixture and broken biscuits.

Remove the springform pan from the fridge and pour in the filling. The refrigerated over night.

The next morning I awoke to a soiled and not mushy cheesecake. The baking paper did not leave the cake that smooth around the edges so that is something that I need to work on. I adored the creaminess of the cake and the chocolate biscuits bits and pieces hidden in the cake. I would definitely make this again.

Once when eating out a lady who got a piece of apple pie declared that some of the cake is missing and rejected it. Perhaps she would declare some part of the cake missing and reject this too..

Friday, May 13, 2011

Egg, chrizo and wholemeal bread pie

I really haven't felt like writing lately. Had an exam last week. Only the one but it was enough to stress me out. It has passed and suddenly I have some free time and I am not quiet sure what to do with it. Should I cook, no don't feel quite like making something new. Write on this blog. Not really, I rather enjoy looking at the creative efforts of others. What else? The creative efforts of yester years have disappeared and I tend to roam the internet in search of ghost stories and some photo history of Sydney. I waste plenty of time on this world wide web. It doomed my creativity. Alas, I return to this blog and try to pick up some of what remains of my literary merit and I aim to say I baked a pie and show you the efforts of my labor.


The pie featured in the New Idea magazine and I thought it looked nice. Though it demanded 12 eggs and so I split the recipe in half. Luckily the halving of the ingredients was done otherwise it would have overflowed my spring form cake pan. Thus it would have demanded a clean up in the oven. So, here is to the birth of the Egg, chrizo and wholemeal bread pie.

The ingredients
6 eggs lightly beaten
150 ml thicken cream
Salt and pepper to taste
1/4 loaf of wholemeal bread (crust removed and cut into 2cm pieces)
1 chorizo, cut up
1 tablespoon of oil
1 onion thinly sliced
1 zucchini, thinly sliced
1 garlic clove, crushed
1 tablespoon finely chopped thyme
1/2 cup grated vintage cheddar

The Method

Grease and line a 24 cm round cake pan with baking paper. Preheat the oven to 180 degrees Celsius.

Combine eggs and cream in a bowl. Add salt and pepper and then press the bread into the mixture, until all the bread is completely covered.

Pan fry the chorizo for about 3 minutes. The remove from the pan and allow to cool.

Heat oil in the pan now. Cook the onion until soft. Add the zucchini, garlic and thyme. Stir for about 5 minutes until the zucchini is soft. The remove from the stove and allow to cool.

Add the chorizo, zucchini mixture, with half of the cheese to the bread mixture. Mix to combine. Pour the mixture into the cake pan and sprinkle with the remaining cheese. 

Place into the oven and cook it until the egg is cooked and a skewer comes out clean. Remove from the oven and allow it to cool for 10 minutes.

Serve it with something green and yummy.


Monday, May 2, 2011

Milk Chocolate Souffle

After failing to make a souffle in my previous post, I set out the next night to make an actual souffle. This time I decided to use milk chocolate. I did want to make a souffle that was half white chocolate and half dark chocolate but with time constraint only lead me to find milk chocolate in a convenience shop close to home.


The Ingredients

Soften butter for greasing the ramekins
90 grams of milk chocolate
1/2 tablespoon of caster sugar plus some for coating of ramekins
3 egg whites
2 egg yokes
75 ml of thicken cream
1 tablespoon brandy
Icing sugar for dusting

The Method

Preheat your oven to 220 degrees Celsius.

Grease the ramekins with butter and then sprinkle caster sugar. Refrigerate until you place the completed mixture into the ramekins.
Place the milk chocolate and cream into a bowl sitting over warm water in a saucepan to melt the chocolate. Mix until the chocolate melts and it is all smooth. Remove the bowl from the heat and mix in the egg yokes and the brandy.

Using an electric mixture, whisk the egg whites until soft peaks form. Add the caster sugar and whisk it until its glossy.

Gently fold in the egg whites gradually and fold until combined. Fill up your ramekins just below the rim and bake for 8-10 minutes. Remove from the oven and dust with icing sugar and gobble it all up with a special someone. 


Monday, April 11, 2011

Dark Chocolate Souffle Derivative

I didn't have any luck recently trying to make a cheese cake. It would have been a stunner if only it did not collapse when I tried to remove it from the pan. It never set and if you closed your eyes and ate it, you would not know any better. I also had some issues making my first souffle. I didn't read the recipe properly and did a variation which I call the souffle derivative and I rather liked the velvety texture it create. I am just not so keen the dark chocolate, its a bit to rich for me.  

I did not take any photos until the completed product. Just wanted to get it all done quickly rather than posing for photos. I will resume taking photos soonish of the process. 

The Ingredients

Soften butter for greasing the ramekins
90 grams of dark chocolate
1/2 tablespoon of caster sugar plus some for coating of ramekins
3 egg whites
2 egg yokes
75 ml of thicken cream
1 tablespoon brandy
Icing sugar for dusting

The Method

Preheat your oven to 220 degrees Celsius. Now my oven started to smoke here and even set off the smoke alarm when I opened it. My oven has never been to that temperature since I moved in. When I made an actual souffle I preheated the oven a bit later on.

Grease the ramekins with butter and then sprinkle caster sugar. Refrigerate until you place the completed mixture into the ramekins.
Place the dark chocolate and cream into a bowl sitting over warm water in a saucepan to melt the chocolate. Mix until the chocolate melts and it is all smooth. Remove the bowl from the heat and mix in the egg yokes and the brandy.

Using an electric mixture, whisk the egg whites until soft peaks form, which is when you can hold the bowl upside down over your head and it will not fall on you. Now add the caster sugar and whisk it until its glossy. WAIT!!!! This is what I should have done but something got all mixed up in my blonde head (no I am a brunette), well it was a blonde moment. I am sure we all do have these moments, including guys. What I actually did was add the egg whites to the chocolate, cream brandy mixture and started whisking it with an electric mixture. It was then, when I reread the recipe that I saw that something was amiss. Where were my fluffy egg whites. Nonexistent!! They were all combined into the chocolate. What to do? I asked myself. Abandon it? Nahhhhh. I whisk the mixture a bit more, took out the two ramekins from the fridge, poured my derivative mixture into them and placed them in my hot smokey oven to bake for about 10 minutes.When done dust with some icing sugar.


Here is how they looked like when they came out. I really like the texture of it. Different from a souffle and different from a cake. If anyone knows what this is actually called I would love to know. The texture was thick and velvety. As you glided the spoon into it and through it, it broke away. I may make this again, but maybe a white chocolate one. Dark chocolate is not my favorite but otherwise this is and was my souffle derivative. 

Wednesday, April 6, 2011

Chrusty (Faworki)

I have a Polish background. My mother hailed from Poland and my father's family hailed from Poland, though his family migrated to another European country before his birth. I was born in Australia and I always remember my mother making a Polish sweet. We made it for family gatherings, made it for multicultural day at school. Then I made it for my children's multicultural day at school and I made it for this year's harmony day at work. This sweet is called Chrusty or Faworki.

I got a recipe for it from my mother's Polish cook book but I somehow misplaced it, which is not unusual for me. I even at times have misplaced my car keys to find I was holding them in my hand. I got all flustered for absolutely no reason. So I looked for another recipe on English and Polish websites and settled on the following recipe. My ability to read Polish is somewhat limited and wondering how much is a glass of flour in a Polish recipe, left me taking hold of a English recipe. They do their measurements a in glasses so it left me wondering how big is a glass of flour? Does it mean a cup?

The ingredients

250 grams of flour
5 egg yokes
2 tablespoons of sour cream
1 tablespoon sugar
1 tablespoon on vinegar
Icing sugar for dusting

The method

Mix the flour, egg yokes, sour cream, sugar and vinegar in a bowl. Knead it into a dough and then, with a rolling pin, roll it out flat, a few millimeters thin.

 Using a knife make lines in the dough, as shown in the below photo.

In each cut out strip, cut it into roughly 10 centimeter length and cut a three centimeter slit in each piece that will become the Chrusty. See the photo below for guidance.

Take one end of the chrust and pull it through the slit in the middle until you get it looking as follows.

Heat up some oil for a shallow frying. Add spoon of vodka in the oil to prevent it from foaming. Yes the Polish solve everything with a vodka or two. When the oil is hot enough fry the chrusty until golden and then remove from the heat and when all completed, dust them over with some icing sugar on both sides. There has been hardly a person who could resist Chrusty. Faworki is another term they are known by but I have always known them as Chrusty. Pronounced with a H sound and not a CH.

Friday, March 25, 2011

Lasagne

I had some inspiration a few years ago to make lasagne. Mind you I had never made it before and had somewhat of an idea of how it was made. Or so I thought. Using no recipe but one could have been easily found. I should also say I should have asked my mother. I was ambitious, overly confident and thought I could pull this off. I should now say, my overly confident persona is way too confident for no particular reason. I do have those moments where it flourishes but it comes crashing down. Then I retreat back into my self critical world, which I find is a much more safer place to be. When my first lasagne came out of the oven, the sheets of pasta were dry and brown, the sauce did not exist and it was deemed that it should not be called lasagna. My husband hated it and when I mentioned that I was cooking lasagne again, it struck fear into his very being and then I assured him "I have a recipe, I have a recipe and I am not using my mind". That did not quell his troubled thoughts and was hesitant about it up to the very point I brought it out on a plate. Also he suggested that I should ask my mother for the recipe

So I revisited the lasagne and found a recipe on Taste called Our favourite lasange. Here is the next chapter of my quest to master the lasagne.

The Family of Ingredients


2 tablespoons of olive oil
1 brown onion, chopped
2 garlic cloves, crushed
750 grams beef mince
2 by 400 gram cans of diced tomatoes
1/2 cup dry red wine
1/4 cup tomato paste
salt and pepper to taste
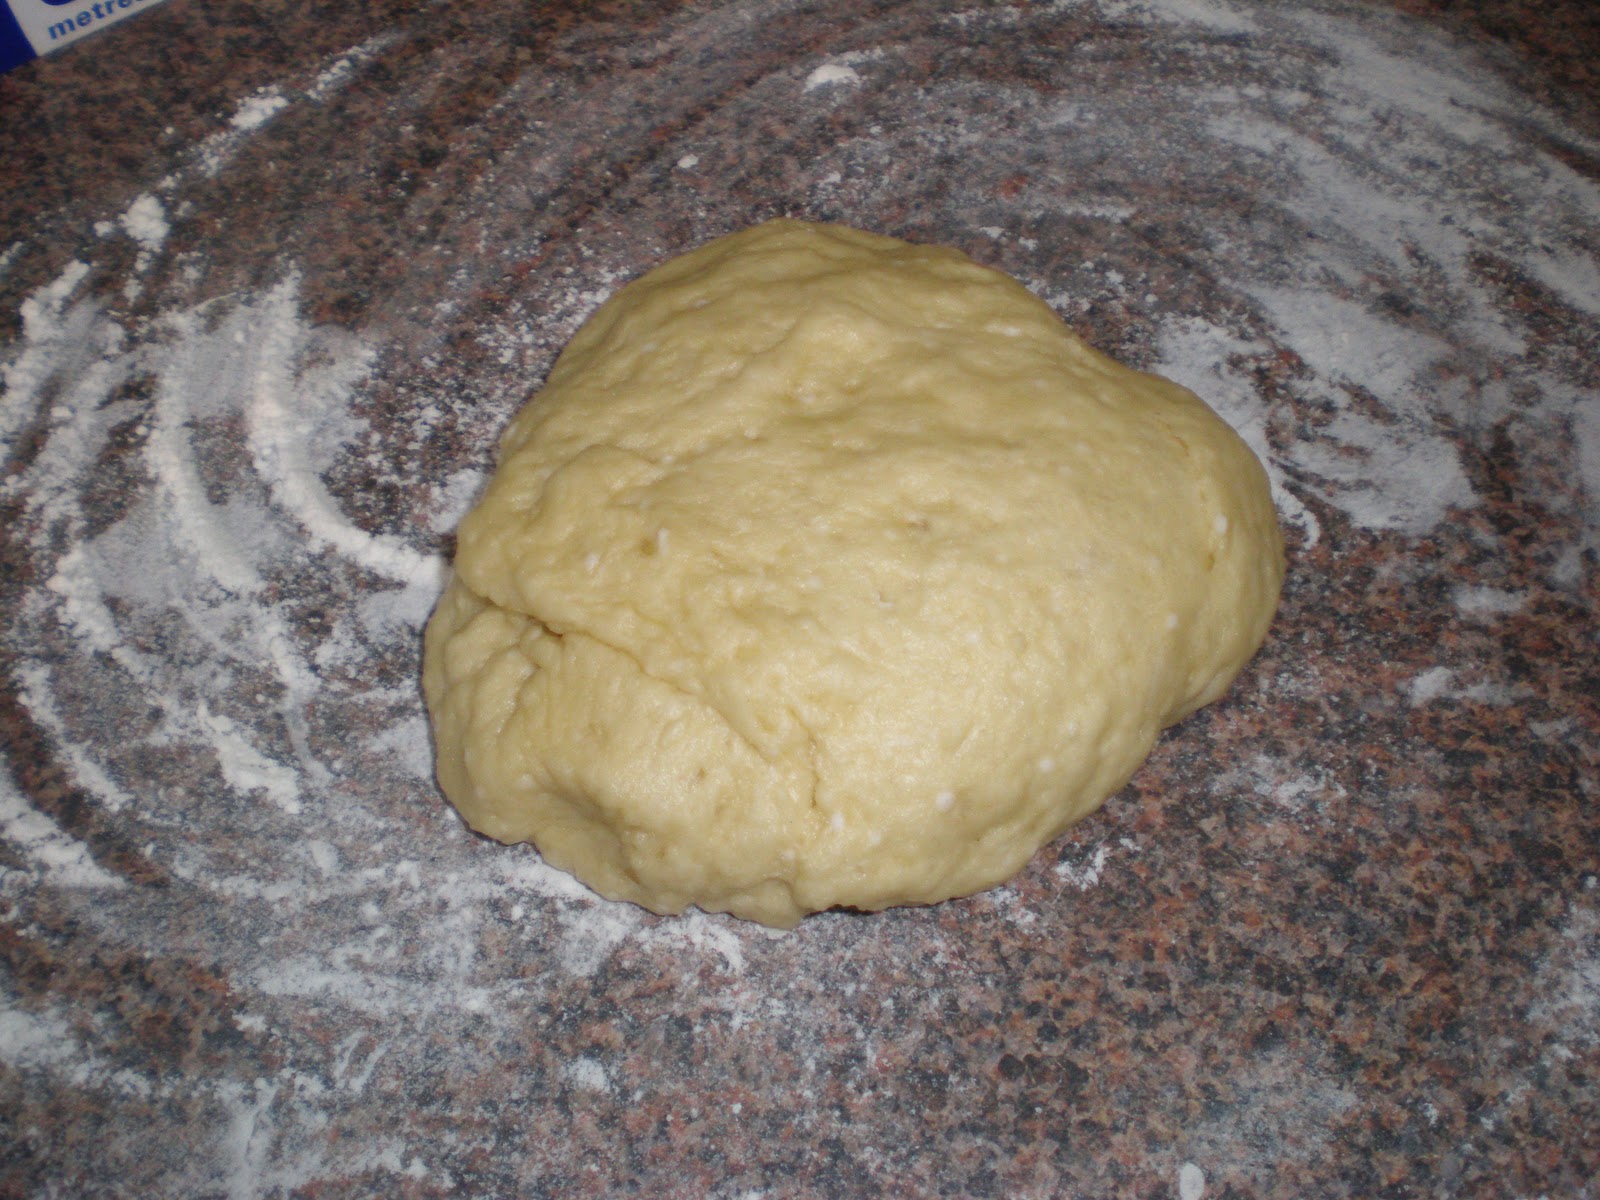
2 lasagna sheets
1/c cup grated mozzarella

Cheese sauce

4 cups of milk
1 brown onion, chopped
8 whole pepper corns
2 whole cloves
60 grams butter
1/3 cups plain flour
1 cup finely grated parmesan cheese
pinch of nutmeg
salt and white pepper

The method

Heat the oil in a frying pan and add the onion and garlic until they soften. Add the mince and break up any visible lumps while stirring. Cook until brown. Then add the tomato, wine and tomato paste and bring it to the boil. I also added some peas and frozen spinach at this stage. Then simmer, with occasional stirring for 30 minutes until the sauce thickens. Remove from heat and season with salt and pepper.

For the cheese sauce, combine the milk, onion, peppercorns, cloves in a saucepan and bring to a simmer. Remove from the stove and allow for the mixture to sit for 15 minutes.

Then strain the milk into a jug to remove the soils. Discard solids.

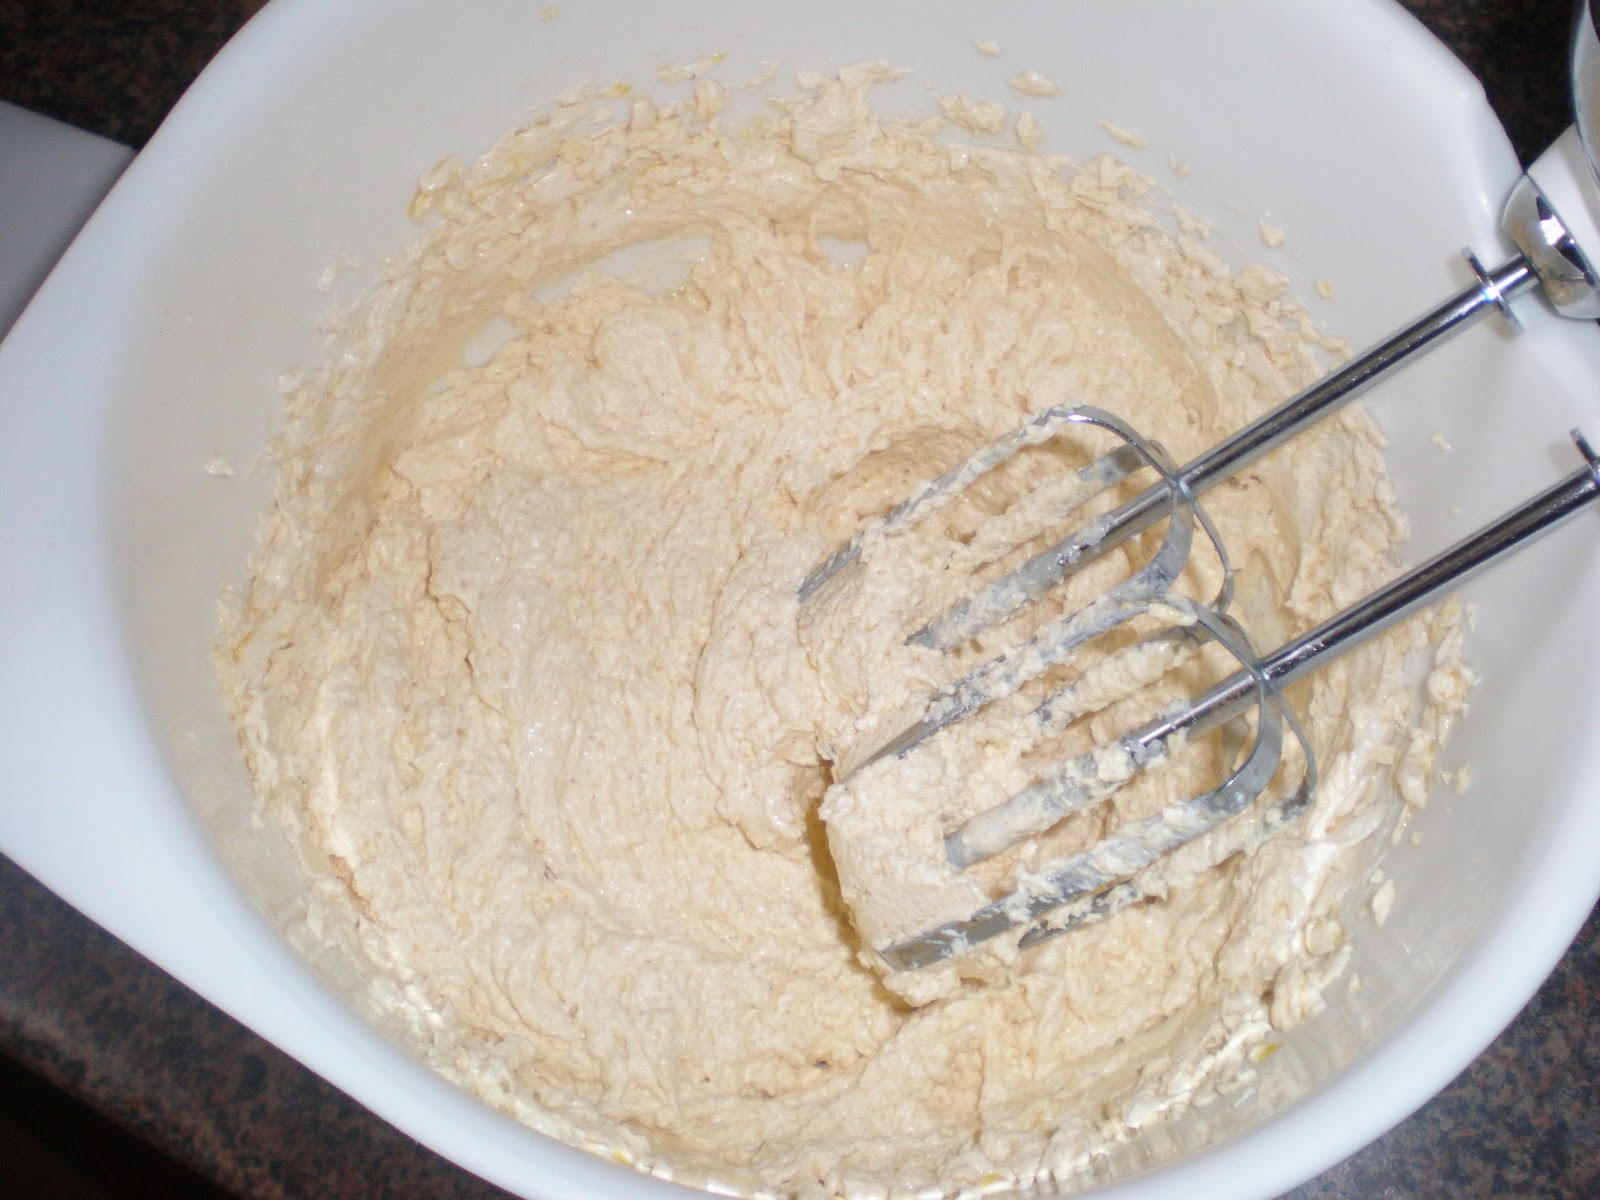
Melt butter in a saucepan until foaming. Add the flour and mix until the mixture bubbles or comes away from the side of the pan. Pour in half of the milk and mix constantly using a balloon whisk until the mixture is smooth. Then add the remaining milk while mixing.
Butter and flour mixture

Addition on milk

Then bring the milk mixture to the boil, while constantly stirring with a wooden spoon until the sauce thickens or coats the back of the spoon. Remove from heat and add the parmesan and stir until the cheese melts. Then add the nutmeg, salt and white pepper.

Preheat the oven to 180 degree Celsius. Coat a rectangular 3L ovenproof dish with olive oil. Spread one quarter of the bechamel sauce over the base. Then array a layer of lasagne sheets over the sauce. Place one third of the mince mixture layer, then one third of the bechamel sauce and then a layer of lasagne sheets. Repeat until you finish with a layer of lasagna at the top. Layer with the remaining bechamel sauce and mozarella.Place it in the oven for 40 minutes, until the cheese melt. Remove from the oven and allow it to stand for 10 minutes to set.
Adding the layers

Layering completed


I did not take a picture of the cut up lasagne as it collapsed on me. So just use your imagination and imagine that it came out nicely and looked a treat. Yes dazzling and tantalizing.

I would definitely make it again but I would have left it to set for longer after removing it from the oven. As I tried to cut it up, it fell apart and the cheese just did not want to part from itself. So every time I tried to pick up a slice of lasagne the cheese would stretch and then bring the whole thing down. I eventually used a knife to make a clear cut and I ended up angry at the lasagne. So yes imagine a perfectly formed lasagna that is it just heavenly.

Saturday, March 19, 2011

Pizza Margherita

I went to my kids friends birthday party last Saturday and her mother served us home made pizza. Loved it. The base was soft and I do not usually like the ham and pineapple pizza. I have issues mixing sweet and savory, well combining fruits with any vegetable or meat. I would pick out the fruit, thinking you should not be there and the put it to the side and not eating it. My thought process is that the fruit is tainted and should therefore not be touched and eaten. Yes, that places some limitation to what I cook but I may get over it one day but not today. So eating the pizza and the party got me into a pizza mood. I wanted to cook a pizza. I would have loved to cook a garlic one, a cheesy one. So onto the computer I went, googled pizza and spent a good half an hour looking for a recipe. I found one and one must pay recognition to the source as me, a once a upon a time budding scientist would have done with references. So here is my acknowledgment http://allrecipes.com.au/recipe/7394/pizza-margherita.aspx for you made my kids hungry for this pizza.

My time during the week is rather limited. With work, my kids studying, my studies takes quite a bit of the day so I am trying to cook something new during the weekend. We also have been watch My Kitchen Rules on TV and my kids suggested I should go on. Me don't think so. I need a recipe on paper and what I know is rather limited. Even the kids on Junior Masterchef could out cook me.

So here is the recipe for pizza margherita which I loved.

The ingredients

The dough ingredients, did not take a picture of the other ingredients

 The dough:

1 sachet dry yeast
1 1/4 cups of plain flour
1/2 teaspoon of salt
1/4 cup of olive oil


The topping

500 grams of tomatoes
1/4 cup olive oil
1 finely diced clove of garlic
1 cup mozzarella, drained and diced (I used the shredded version)
1/3 cup red wine
3 table spoons of chopped basil leaves
1 tablespoon grated Parmesan cheese
1 tablespoon dried oregano

The method

Grease a pizza base of roughly 30 cm diameter with olive oil. Sprinkle yeasts over lukewarm water. Combine the flour salt, oil and yeast in a bowl. Knead the dough for roughly ten minutes, add flour or water if required. I have never created pizza base from dough before, again, this is something I should have learnt from my mother. When kneaded, form the dough in a ball, place it in a bowl and cover. Allow for it to rise for one and a half hours.

I thought that this was not looking promising

Rise, rise

Meanwhile you can work on the topping. On each tomato, mark a cross at the base of each tomato with a small knife. Place the tomatoes in boiling water until the skin on the cut curls back. Then transfer the tomatoes into cool water. Peel off the skins and cut the tomatoes in half. Cut the stalks out, remove the seeds and then dice the tomatoes.


Heat 2 tablespoons of garlic in a pan. Add the tomatoes and wine and cook until it is reduced. Then season with salt and pepper. I added a teaspoon of oregano at the point.


Heat the oven to 180 degrees Celsius. Roll out the dough on a flour surface to a round shape. Place on the greased pizza pan.
The dough before it was rolled out

Bake the pizza in the oven for 3 minutes and then remove from the oven. Spread the tomato paste and mozzarella on the base.The sprinkle the basil and olive oil on top. Then I sprinkled on more mozzarella and dried oregano. Place it into the oven until cooked, about 10 to 15 minutes.

My kids loved it so I will be definitely making it again. They saw the chopped basil but thankfully that did not deter them from eating it. 

Pizza before it was cooked

Finished pizza


Monday, March 14, 2011

Spinach and Ham Frittata

Since my renewed interest in cooking, I have been interested in learning to cook a few things. One of recipe I wished to try was making a frittata. It seemed similar to a making a quiche, which my children like and so I thought I was onto a sure thing. Alas, my son walked into the kitchen when I was at the spinach stage and he declared he did not have any love for spinach and would therefore not eat it. He then walked in again I was at the cherry tomato process and said he does not like cooked tomato. Woe was me. I had already lost before it was cooked and yes indeed neither one of my little ones touched it. I was left alone to eat it as the love of my life was away and food should not go to waste, no, no. So I had it for lunch and dinner for several days.

I personally enjoyed it and I thought it looked rather pretty. It was easy, quick, such a time saver. It consist of protein and vegies and my tummy was thankful for this. It does not seem to particularly like carbs anymore.

The ingredients


1 bunch of spinach leaves, chopped up
100 grams of ham, chopped
250 grams of cherry tomatoes, halved

Frittata mix
6 eggs
2 cloves of garlic crushed
1/2 cups cream
1/3 grated parmesan cheese

The method

Preheat the oven to 170 degree Celsius. Grease a pan, rectangular or square pan. Line the base and sides with baking paper.
Place the chopped spinach in the pan and then place a layer of chopped ham on top. The put on the remaining spinach layer and then a layer of ham.


Whisk all the ingredients together in a bowl for the frittata mix and pour the mix over the spinach and the ham. 


Place the tomato halves on top in neat rows.


Bake it for about 40 minutes and here is the finished product.


Saturday, February 26, 2011

Apple and cinnamon tea cake

A few years ago I received a Donna Hay cookbook from an electricity company that I had recently switched to. It is entitled Simple Essentials: Fruit, that contained various recipes for summer fruits. I was thrilled about getting this cookbook and thought, wow, I could really whip up some beauties. Not sure if this was a thank you gift from the company or was it a secret inducement for me to cook more, which in turn would increase my use of electricity and thus my electricity bill would soar. Conspiracy! It was not to be. It was then to lie abandoned in my kitchen draw to be eventually claimed by my daughter as her own. I would not look into this cookbook to seriously consider making anything for two further years.

The years rolled by, I had turned greyer, my children had grown taller and my husband pretty much stayed the same. He is ageless. The kids and I were to head over to their friends place and at first I thought, I told myself I need to get something for them as a thank you gift. Then I thought, what would be better was for me to cook something that would show I did appreciate the invite. I had a recipe that I had my eye on for the past two week and so I made it today. Here is an apple and cinnamon tea cake from Donna Hay.

The ingredients


185 grams softened butter
1/2 teaspoon ground cinnamon
2/3 cups caster sugar
3 eggs
1 1/2 cups of plain flour
1/2 teaspoon of baking powder
1/3 cup of milk

Topping
4 small green apples
1 teaspoon sugar
1/4 teaspoon ground cinnamon
1/4 cup apricot jam, warm

The method

Preheat oven to 160 degrees Celsius.

Place the butter, cinnamon and sugar in a bowl and beat with an electric mixer until light and creamy.


Gradually, one by one, add the eggs and beat well.


Sift the flour and baking powder over the butter mixture and add the milk, stirring until combined.


Line the base of a spring-form tin with non-stick baking paper and spoon in the mixture.


For the topping, cut a row of deep slits in each apple half and arrange on the top of the cake. I used two apples as they were too big and there was no way 8 apple halves would have fitted on top of the cake.

Combine the sugar and cinnamon in a bowl and then sprinkle over the apples. Place it in the oven and bake it for 50 minutes. Then remove the cake from the oven and brush the cake with warm jam and then return it to the oven for a further ten minutes. Then your cake is ready to eat.

I had some issues with removing it from the pan as the baking paper had finished. I had to turn it upside down on a plate, remove the baking pan's bottom and then put it upright on another plate. A small part of it got stuck to the plate and so the pictures below are when the cake was untouched, still stuck to the pan.