Friday, January 28, 2011

Lamingtons

Australia Day has come and gone. Here in Aussie Land my car was all decorated with 4 small Australian flags that flapped in the breeze as we drove along. Rather nosily mind you. My kids were decorated with Australian flag tattoos, well only just one tattoo each. Apart from the car that was embracing the Australian spirit, I decided that my family's stomachs should ingest something rather Australian too. The lamington was the choice of the day.

Now some history on the lamington. I read a few differing versions of historical facts about the origins of the lamington.They all center around Lord Lamington. One was that a maid-servant accidentally dropped sponge cake in melted chocolate and the covering up in coconut was to avoid messy fingers. One version was created for unexpected guests by Lord Lamington chef. Another version was that they were meant to resemble homburg hats which Lord Lamington had he favored. Here is the link from which this information was obtained from http://en.wikipedia.org/wiki/Lamington.

Below is the recipe of the basic lamington with no cream, jam, caramel filling. I have forgotten how good they taste. I love coconut in any form of cooking. In fact I like it also in hand cream, soaps, body scrubs, shampoo. I just think the smell and taste of it cannot be beaten but that is a personal choice. 

The ingredients

The Cake 

125g butter, softened 
¾ cup caster sugar
 2 eggs, slightly beaten 
1/2 teaspoon vanilla extract 
2 cups self raising flour 
Pinch of salt 
½ cup of milk

The chocolate icing
 
3 tablespoons cocoa 
3 cups icing sugar 
½ teaspoon butter 
boiling water
Desiccated coconut

The method
Line a 17 by 28 cm baking tray with baking paper.

Cream the butter and gradually add the sugar until the mixture is light and fluffy.

Add the eggs, vanilla extract and beat the mixture until combined.

Preheat your oven to 180 degrees Celsius.

Sift the flour and salt.

Gently fold the flour and salt into the creamed butter mixture alternating with the milk.

Place the cake mixture into the baking tray and into the oven for about 30 minutes.

When done allow the cake to cool on a wire rack and then cut it into your desired shapes. 

With the chocolate coating, mix all the ingredients except for the coconut, in a bowl. Add water until the mixture is runny but thick. The recipe that I was using stated 5 tablespoons. Me no thinks so. That is no where near enough. In a separate shallow plate place the desiccated coconut. Dip each piece of cake firstly into the chocolate coating and then into the coconut.

There you have it, lamingtons. 


Monday, January 24, 2011

Chocolate Valentine Cupcakes

This Christmas past I became acquainted with a little book. My sister gave me a delightful cook book for Christmas for making cupcakes, cheesecakes and cookies. As I turned the pages all I saw was utter perfection, that made me aspire to create everything that I visualized. I could not decide on what to create first. Was it to be a cupcake, a cheesecake for I have never had made one in my life. Or was it to be a biscuit, the short bread button cookies that looked unique and so unlike a common biscuit. Each recipe was worth creating in its own good time. Seriously, there are so many recipes in this world that you shouldn't really have the same thing week after week. Though there would be plenty of energy expended on searching, deciding and then shopping just to cook each one and so therefore the familiar and known is much more easier.
Womens Weekly Cupcake Cheesecake cookies

During the course of creating the chocolate valentine cupcakes I have found an arch nemesis. It did not come in the human form but as a innocent looking jar of FONDANT. I would not have dreamed of it being so difficult to handle. Sure I have read about the issues which people face when dealing with this lump of sweetness but I did not expect what on earth meet me when I removed it from the jar. I believe I was being far to optimistic. My ghastly fight with it is captured in the photos below. Goodness, would I return to make a cake using fondant again? Questionable.

Well, with Valentines Day fast approaching and the month of January slipping by, I decided upon a recipe in my new little big book that was themed for Valentines day.

Note the chocolate valentine cupcakes were meant to have a layer of chocolate fondant. I just used regular fondant as I do not have the time during the day to drive around, find all the ingredients and then create chocolate fondant. The recipe I will present will include the chocolate fondant. Here it goes.

The ingredients


Double chocolate raspberry cake
60 grams dark eating chocolate, chopped coarsely
1/2 cups water
90 grams soften butter
1 cups of brown sugar
2 eggs
2/3 cups self-raising flour
2 tablespoons of cocoa powder
1/3 cup almond meal
100 grams frozen raspberries

Decorations
2 tablespoons of cocoa powder
900 grams chocolate fondant
1/3 cup raspberry jam, warm and strained
1/2 cup icing sugar
150 grams red prepared fondant
150 grams white prepared fondant
pink food colouring


The method

Preheat oven to 150 degrees Celsius for fan forced. Line a cup cake pan with 12 paper cases.

On the stove, combine water and chocolate on low heat until smooth.
Water and chocolate

Beat butter, sugar and eggs with an electric mixer until combined.

Stir in sifted flour and cocoa, almond meal, then the warm chocolate mixture. Fold in the raspberries. Divide mixture evenly among cupcake cases.
Adding sifted flour, cocoa and almond meal

Adding the warm chocolate mixture

Folding in the raspberries

Now the recipe suggests to bake the cup cakes for 45 minutes. I did this and I found them too dry when I removed them from the oven. Is this a trick of the trade for something? My limited cooking knowledge leaves me blank. I suggest checking them until they are done and not what the clock is telling you as per the method in the cook book. Remove them from the oven and allow to cool. The recipe now suggests to remove the cases, I left my own on for no particular reason apart from an oversight of this step. Why do I keep doing this?
Cake mixture divided evenly among cases

Cupcakes all ready

Now, if you have your chocolate fondant, dust the bench surface with cocoa and roll out the fondant until it is 5mm thick. Cut a circle of fondant that is enough it cover the top of the cupcake. Brush the tops with the warmed raspberry jam and cover with the chocolate fondant. Right, I didn't make chocolate fondant so I just used my shop bought fondant and left it white to cover the cupcake tops. Now this is when the nightmare begins. Now cooking, baking, frying, et cetera is filled with shockers and winners. This is my shocker of a shocking fondant moment. The fondant was too hard it started cracking, to soft it stuck to everything. The perfect rolling fondant was never achieved!  Maybe it is the fondant I bought that is in the wrong? Maybe it is not design for the purposes I had designed for it? Some other than myself can only tell me this. I am ignorant about such facts of cooking. I am straying. Now back to the method.
This was the fondant I used

One badly covered cupcake

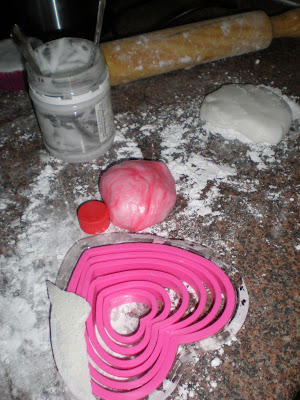
On a spotless surface dusted with icing sugar, kneed the white and red fondant separately until smooth. Now use the pink coloring to tint 100 grams on the white fondant pink and the remaining white fondant and paler pick. Each shade of pink is to represent a different colored heart on the cupcake. I only used two different heart shapes as the third smallest heart shape cutter was wider than the cupcake.
Here is some of the chaos that ensued.


Roll out each color fondant to a thickness of 5mm. Then using heart shape cutters of graduating sizes to fit the size of the cakes. Now here is the mess I created when trying to roll and then cut out the heart shapes.
Decorate the cupcakes. Using a tiny touch of water to stick the hearts to each other. Just use the what the cupcakes should look like picture as a guide below.


What my cupcakes looked like


How they should of looked like

This won't put me off using fondant again. I will try a different kind or I will become more read about it, which will then translate to improved fondant hopefully via the practical. So my little chocolate valentine cupcakes, may you spread the love this valentines day.

Thursday, January 20, 2011

Butter Chicken

I wanted to make an authentic butter chicken. I have made chicken curry many times before but not butter chicken. I love its taste when I visit Indian restaurants. It's tastes is unique from any other curry. How to exactly describe the taste? Really, no ingredient dominates. The ingredients seem to achieve a balance and who does not love butter chicken.

So I was on a quest to make an authentic butter chicken. I hit google, but not just any google. Instead of entering www.google.com.au  which is my usual search engine, I searched for the Indian web address for google and I found it to be www.google.co.in. I typed in butter chicken and quickly choose a recipe. Why not use the country of origin google to search for an authentic butter chicken.

Here is the step by step instructions to make butter chicken. I do not have the step by step photos
but only a picture of the end product. I put toooo much garlic in and it totally overpowered the curry. The recipe stated just the one garlic clove and I put at least 4 in. I will stick to the recipe next time. 

The ingredients
450 gm Boneless Breasts
2 tbsp Butter 
2 tsp Lemon Juice  
¼ cup Plain Yoghurt  
 ½ cup Cream 2 tbsp Peanut Oil (could not find in supermarket, it was late, I was tired, also I was unfamiliar) 
1 White Onion (chopped) 1 cup Tomato Puree   
1-¼ tsp Cayenne Pepper   
1 pinch Salt  
1 tsp Chili Powder   
1 tsp Cumin (Ground)   
1 Bay Leaf  
1 pinch Black Pepper   
1 tbsp Ginger-Garlic Paste 1 tbsp Cornstarch (could not find, unfamiliar supermarket, feelings of sleepiness)  
2 tsp Garam Masala    
Water as required  


Heat 1 tbsp peanut oil in a large saucepan over medium heat. 

Saute white onion until it becomes soft and translucent. 

Put butter, lemon juice, ginger-garlic paste, garam masala, chili powder, cumin and bay leaf into the saucepan. Stir it for about 1 minute. 

Add tomato puree to the mixture. Cook it for 2 minutes while stirring frequently. 

Add cream and yoghurt into the same pan and mix. 

Reduce heat to low and cook sauce for 10 minutes.

Now add salt, black pepper and cayenne into the mixture

Cut the Chicken to bite-size pieces and add to the sauce.

Mix cornstarch and water and add it to the curry. Cook chicken for 5-10 minutes, or until thickened. 

Perhaps if I had the peanut oil and cornstarch that would have change the flavor of my curry. Also with the deduction of some garlic. I will try this recipe again but this time around it was just another chicken curry.

Hark!!! I seem to have deleted the photos I took. They are not on the camera or on the computer. Sorry for a pictureless post. Just imagine.

Tuesday, January 18, 2011

Feta and Prosciutto Stuff Chicken Breasts & Mediterranean Pasta Salad

Pardon me as I write this, I am running on about 4 hours sleep. Why? It was my own doing, I just didn't want to sleep. I slept at 1.30am and woke up around 6.30 am. So, well that is more like 5 hours of sleep. I just like dedicating some hours, well as many as I can physically can before I fall asleep upright at the computer, to do things that I enjoy. That usually turns into pointless aimless wandering across the world wide web. Been meaning to start hobbies I use to enjoy when I was youthful and carefree. So far? An utter failure.

I wanted to cook something new and so I hit the net, googled up recipes. Scanned, scanned, scanned for something to cook. I take forever to decide on what to cook. I can sit there for an hour looking before I decide on anything or I decide on nothing. Therefore wasting an hour. 

Here are the two recipes that I decided on.

Firstly, Feta and Prosciutto Stuffed Chicken Breasts

The Ingredients


8 tablespoons of olive oil
1 lemon, juiced
4 crushed cloves
1 tablespoon of dried oregano
Salt and pepper to taste
4 chicken breasts
4 slices of feta cheese
4 slices of prosciutto, fried and drained

The method

Preheat the oven to 180 degrees celcius.

In a bowl, combine oil, lemon juice, garlic, oregano, salt and pepper.


With the chicken breasts, make a silt down one side of each one in order to form a pocket.


Stuff chicken breasts with feta cheese and prosciutto. I used more that 4 slices of prosciutto. I personally love the taste of prosciutto.


Secure the open sides of the stuffed chicken breasts with toothpicks. 


Place the chicken in a baking dish and pour the oil mixture over the chicken breasts.


Bake uncovered in the oven for about 35 minutes, depending on the size of the chicken. Bast the chicken occasionally with the oil mixture.

Here is the finished product.


I personally will not make this again. It was quick and easy but I was not too impressed with the taste. The chicken breasts I used were huge and I should have pounded them thinner. So the prosciutto and feta flavors were lost in all the chicken. If I did make it again, I would definitely use smaller chicken breasts.

Next, Mediterranean Pasta Salad

The ingredients


250 grams of pasta ( I used spirals)
4 Italian Sauages
2 green zucchini, halved lengthwise and thinly sliced
100 grams store bought grilled capsicum, drained on a paper towel, thinly sliced
180 grams sundried tomatoes, drained in a paper towel, thickly sliced
145 grams kalamata olives
150grams of feta, crumbed
1/2 cups finely shredded basil
2 tablespoons of olive oil
2 tablespoons red wine vinegar
Salt and pepper to taste.

The method

In a saucepan, cook the pasta.

In a pan, cook the sausages until cooked. Remove the sausages from the pan and then add the zucchini and stir until cooked. 

Feta, sundried tomatoes, capsicum, sausages, BASIL!!

Thinly cut the sausages. Place the pasta, sasuages, zucchini, capsicum, sun-dried tomates, olives, feta and basil. Add the olive oil and red wine vinegar. Salt and pepper to taste. Toss the salad and it is ready to serve.


Now this was a flavor explosion. I taste tested it and I thought wooh!!!! This is overwhelming my tastes buds. The olives, sundried tomatoes and capsicum are so flavorsome. It was truly a party in my mouth. Did the party get slightly carried away? I believe so. If you love all those flavors then this is the dish for you.

Here are my newly created babies together.
Dark and brooding


Wednesday, January 12, 2011

Creamy Pasta with Bacon and Eshallots (Green Onions)

Once upon a time there was a humble house wife, contented with day to day life. Raising her children, performing the house hold duties which included feeding her near and dear. 

One day she bought a new microwave. It was all new and shinny and she admired it from afar. Then she opened it's one and only door and discovered a lovely book containing recipes inside. In great wonderment she placed it in her hands and slowly opened it and began to turn the pages. Before her a story began to unfold.

Once upon a time there was an onion all nicely cut up,


Four garlic cloves. They were no ordinary garlic cloves for they were grated and fine.


Four rashers of bacon, who were quite the conformists, decided to be all cut into small pieces, just like their friend the onion.


They gathered together on a hot dance floor. Firstly the garlic arrived.


It was followed closely by onion and bacon. They began dancing together for roughly about 5 to 10 minutes. 


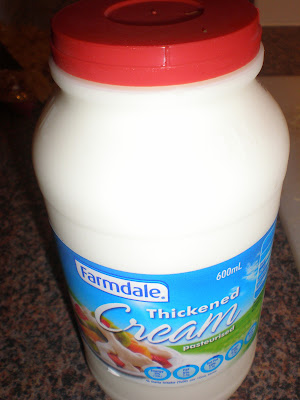
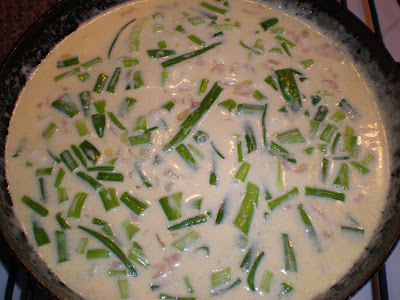
Then a shower of shredded tasty cheese and thickened cream rained down on the dancers on the dance floor. The downpour of cheese and thicken cream danced about until they became indistinguishable from one another.


Lastly the cut eshallots fell into the mixture and it swirled for moment and were closely followed by freshly cooked pasta.


 A final dance sensation occurred and they became a tasty and easy meal for the housewifes family. 


The happiness that this meal bought has continued through out the years and up to this moment in time. Even now, with some grey hair on her head, the house wife continues to make this creamy pasta. Though she is positively sure that it was intended to be made in the microwave oven.

Okay, away from the story sequence, the ingredients are as follows:

1 cut onion
4 rashes of bacon, cut finely
4 garlic cloves, crushed
4 eshallots, cut finely
150 grams of grated cheese or any amount to you liking
thicken cream to your liking
250 grams pasta

The method

Fried the garlic in a pan with a tablespoon of olive oil.

The add the onions and bacon and cook until the onion and bacon are done.

Then add the cheese and thicken cream and mix until the cheese melts.

Add the eshallots and pasta and mix to combine. Then serve.

My kids love the recipe, so do my parents and my sister dearest. It is simple, quick and easy to make when you may be in a hurry. Make it more cheesy, more creamy or add mushrooms,  it is all up to you.